Saturday, March 17, 2012

Beannachtaí na hÉireann do gach mo chairde!

Which translates to something like...Irish Blessings to all my friends!


I hope that each and every one of you had a fabulous day today. 


Here in New York, the weather was superb, perfect for the wonderful parade through New York City and I am certain many bar crawls! Ahhh, the wonders of Green Beer...lol!
This month marks a year that I have been blogging.
Last St. Patrick's Day I gave you a recipe for a cabbage dish that my mother loved to make. This year isn't going to be any different. We have more cabbage, this time stuffed and baked. Absolutely delicious!
I also made some fabulous Irish Soda Bread, and wasn't distracted today so they didn't burn.  You can find the recipe for the Irish Soda Bread here. Doesn't it look so yummy?


This one is not hard to make. It's easy, and pretty fast. You'll want to make this every year!

I knew that this year I wanted to make stuffed cabbage to go with our St. Patrick's Day celebration.  It's something I always loved when my mom made it, and as luck will have it, my family loves it when I make it too. I'm positive that there are a bazillion recipes for stuffed cabbage however, if you have ever had a cabbage roll that had no flavor, with no seasoning, you would be wondering what's up with that? Trust me, these rolls are packed with flavor!
I bought the largest head of cabbage I could find. I took out the core and covered the head of cabbage in a huge pot of water and brought the water to a boil with the cabbage submerged. After 10 - 15 minutes of the water boiling I started removing layers of the cabbage. Just a few at a time and let them cool off so you can handle them without getting burned.
For the stuffing you will need the following

Ground Beef - 2 pounds
1 large onion, chopped fine
5 cloves garlic, chopped fine
1 head of parsley, stems removed, and chopped fine
1/2 cup grated cheese, any cheese you want! I used Italian Grated cheese
Salt and pepper to taste
1/2 grated whole nutmeg
2 - 3 handfuls of  uncooked rice

It's very easy!  Mix everything together.
With a spoon take a nice amount of the meat mixture and put it in the cabbage leaf.

Starting at the bottom, roll up or down depending on how you like to work!
Now fold in the sides and roll up and place on a tray with the seam down.


Line the bottom of your baking pan with cabbage leaves. Place the stuffed cabbage rolls on top.
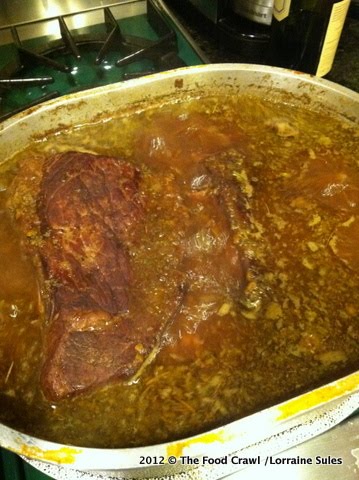
Cover the cabbage rolls with crushed tomatoes. I made 20 large cabbage rolls, and used 2 large cans of crushed tomatoes and then added 2 cans of water.
At this time you can also add 1/2 cup of vinegar. I used red wine because it's what I had handy. It really makes the taste and flavors pop!
Cover the rolls with more cabbage leaves.

Cover with foil and bake in a preheated 375 degree  oven for an hour. Uncover and let the cabbage rolls cook for an additional 1/2 hour.

The tomatoes cook nicely and the top layers of cabbage protect the rolls from getting dried out.
If you have the time, let the pan rest for 20 minutes before serving.The cabbage will be tender and the rice will be cooked perfectly without being over done.

I like to serve the roll on top of one of the baked leaves.  These are so delicious and satisfying that they could be served on their own!

There are 4 things you must never do: lie, steal, cheat, or drink.
But if you must lie, lie in the arms of the one you love.
If you must steal, steal away from bad company.
If you must cheat, cheat death.
And if you must drink, drink in the moments that take your breath away... 


Happy St. Patrick's Day!

Buon Appetito
Enjoy!
xoxoxo
Lorraine

Sushi Mike's


It's Friday night during lent and what could possible be better than eating fresh fish. When I suggested  Sushi to my husband, even though it's not my favorite, my husband readily agreed. He loves Sushi, Sashimi and all that goes with it. We thought we'd do a little food crawling in White Plains. There is a sushi restaurant that we have been wanting to try.
 When we asked the kids if they wanted to eat with us, and they found out it was Sushi they quickly decided that they would love to dine with us on a Friday evening!  They love Sushi! Me, I usually just eat the rolls. I try to sneak in a  California Rolls,  or maybe some spicy tuna rolls. It's just not my favorite.
We tried getting into the restaurant in White Plains and it was packed. No walk ins we were told, you must have a reservation. So I called! When I asked if there was any availability for a table for 4 Iwas told that a table would become available after 9 pm.  We all got back into the car and started off in another direction. I knew if I suggested our favorite local Italian restaurnat the kids would have baled on us. They were in it for the Sushi...come on, it's a Friday night!
When my husband suggested  Sushi Mike's of Dobbs Ferry I called before he could finish his sentence! I love Sushi Mike's!
I met Sushi Mike last year while attending The Westchester Food and Wine Event 2011. Not being a true sushi fan I first passed by him just looking at his food, truely impressed by his presentation at the event. He offered me a dish and once I tasted one of his special rolls I knew that I could fall in love with Sushi and raw food.  It was divine and I knew that my family would fall in love with his mastery of food from the sea.
Sushi Mike, himself!

When you walk into the restaurant you are greeted by Mike. He has an infectious laugh and is quick with a joke. The restaurant is very small.  We wanted to wait for a larger table to become available. I could tell that my group was getting a little antsy and frustrated at the wait. Once we sat down and started to eat they forgot about everything but what was in front of them. Again tonight we had a meal that we talked about on the drive home.
 Live Scallops sliced so thin, and so fresh you could still taste the sea! Soft shell crabs sauteed in garlic and butter sauce, so delicious that you wished you had more. The Red Snapper pan fried with jalapeno peppers and onions was like nothing we've ever had. That was just our appetizers.
We order a boat! The best part is we leave it all up to Mike. He takes care of us! The better he knows us the better he can serve us. We are always impressed by what he puts in front of us. It's the very best quality, very fresh and always a work of art.  It's nothing like we've ever had anywhere else!


My dish of rolls. There's not one California roll on the boat!

It's always good, down to the last morsal of roe!
This place is a gem!
If you decide to go, make sure you make a reservation, and get there early!

Sushi Mikes

146 Main Street.
Dobbs Ferry, NY 10522
(914) 591-0054


Buon Appetito
お食事をお楽しみ下さい
xoxoxo

Lorraine

Wednesday, March 14, 2012

We're Banana's for Yonana's!

Those of you who know me personally know about my weight loss (release) journey these last 8 months. While I won't bore you with all the details, I will tell you that I have lost 53 pounds through diet and exercise. I feel great! I still have a few more pounds to loose. When I am done and at goal, I'll share some before (uggghhh) and after pictures! That's all I have to say about that. If you'd like more details, please feel free to email me and we can chat.
That being said, I'd love to tell you about something that my family and I have fallen in love with.
It's the Yonana's!
While my family is chowing down on  Haagen Daz (love it)  and Ben & Jerry's (love it)  I am indulging myself  guilt free!
Start freezing some ripe bananas! After reading this you are going to run out and buy one of these machines! If you start freezing the fruit now, you won't have to wait 24 hours to have your treat!

I peeled and then individually wrapped bananas. The bananas are best when they are very ripe! They will be so sweet! I washed, and cleaned a basket of strawberries. They went into the freezer for 24 hours.


Add one banana at a time.  In between adding the banana's add any other frozen fruit and follow with a banana.  Yonana's comes with a recipe book full of great ideas! We've tried strawberries, cantalope, blueberries, blackberries and raspberries. If you only use the frozen berries and fruit other than banana's it comes out more like a sorbet. The banana's give the frozen treat more of a creamy consistency which makes you feel like you are eating ice cream!


When you are done putting your frozen fruit through the machine, mix it all up, and make individual servings. You'll be delighted with your healthy, frozen treat.  I should have made this look pretty for you, but we couldn't wait to eat it.


 I am not affliliated with Yonana's in any way! I'm just sharing!

Buon Appetito
xoxoxo
Lorraine


Saturday, March 10, 2012

Mom's Pot Roast

When we were growing up my mother used to make this dish and I can't begin to tell you how happy it would make us to smell this cooking. It excited not only us, but our friends. We would sometimes butter up the wonder bread, (can you imagine?)  and dip it into the cooking pot just to get to soak up the deliciousness.  My mom wasn't looking when we did this. I have a feeling if we ever got caught we would have felt the sting of a wooden spoon across the back of our hands!
Back in the day, a pot roast was called a pot roast. I can recall a time when my mother wrote out the recipe for my father to submit to his manager. The company my dad worked for was putting together one of those spiral bound cookbooks. We all voted for the pot roast recipe to go into the cookbook, but for some reason my dad didn't want to call it pot roast. I think he felt that the title of Pot Roast would not reflect how good the dish actually was , so my mom suggested calling it a braised beef, as if that somehow sounded any better. The recipe went into the "cook book" as Braised Beef. I still think it should have gone in as Ottavia's Pot Roast. Anyone who had ever eatten my mom's Pot Roast would have recognized it for a winning dish, one well worth making.  Braised beef could be just about anything!
My friend John P, still talks about this pot roast. I know it's one of his favorites that my mother used to make. It's favored my many if truth be told! Whenever John see's me, he always asks me if I make this. I just laugh. You know I do, John...now you can make it too!
It's easy to make, just takes a little bit of time, but well worth the planning ahead to make this.
My family loves this served with mashed yukon gold potatoes. Add a vegetable, make a delicious fresh green garden salad and your meal is complete.
Here's what you will need to make this amazing pot roast.

- An inexpensive cut of beef
   3- 4 pounds
- 2 carrots, peeled
- 1 large onion, peeled
- 2 ribs of celery
- handful of dried porcini mushrooms (the more the better)
    you can find these in an Italian market, or in your supermarket. They come in a little bag. They are  
    a little on the expensive side, and a little bit goes a long way. They add a tremendous amount of
    flavor! If you can't find them, please email me!
- 2 Tablespoons of Extra Virgin Olive Oil
- 1 1/2 - 2 cups Beef Broth
-  1/2 bottle - 3/4 bottle of a nice red wine
- 2 Bay leaf
- Salt and pepper to taste
- one fresh sprig of rosemary
   if using dried rosemary use a small pinch

Start off by letting your meat get to room temperature and season the meat with salt and pepper.

Get your cooking pot nice and hot, add the olive oil and immediately add the meat to brown.

While browning the meat, soak the porcini mushrooms in hot water and set them aside.

Add the carrots, celery and onion to a food processor and pulse until they are finely chopped/grated. My mother would grate all of the vegetables for this dish by hand. To save time, I put it all into the food processor and let it do all the work.


You want to brown the meat on all sides. This locks in the flavors and keeps the meat moist.  At times you will want to turn the meat before it's ready. The meat will tell you when it's ready to turn. It will be easy to lift and not stick to the pot when it's ready.  Let the meat "talk" to you!


Take the meat out of the pot. It's going to look like a mess on the bottom of your pot. Don't worry! It's going to all come up when you deglaze the pan.

Add the beef broth and with a wooden spoon, mix the broth around getting all those browned pieces stuck to the bottom of the pot to come up and incorporate into the broth.


Nice job, right?
Add the vegetables that have been chopped back into the pot with the broth.


Put the meat on top of the chopped vegetables. Add the red wine, porcini mushrooms, bay leaf, rosemary and season with more salt and pepper if needed.
You may think that the wine is too much. Trust me on this one. The alcohol will burn off in the first 10 - 15 minutes of cooking. The red wine adds so much flavor. You will love it.  Remember, if you don't like it enough to drink  don't use it for cooking.


Bring the pot almost to a boil, lower the heat to a simmer, cover and cook on top of the stove for 2 - 3 hours. If you wanted I guess you could finish this in the oven. My mom always cooked this on top of the stove.

The meat will shrink. When ready it will be fork tender! Take the meat out of the pot. Let it rest for a few minutes and then slice it. If the meat is too hot, it will shred when you slice it. So let it rest a little. Letting anything rest in my house is always a challenge! Try it, the slices will be beautiful!


Place the sliced beef on a platter and ladle some of the sauce all over the meat.


Get ready for this to disappear. If you're lucky, you will have left overs! There is nothing better than a pot roast sandwich the next day...

Buon Appetito
xoxoxo
Lorraine