Showing posts with label garlic. Show all posts

Thursday, April 11, 2013

Hey, remember me?

I do remember you!

I do apologize for not keeping a steady flow of new recipes and ideas coming your way. I do promise to be a little bit better about it.

There are many days that we sit down and enjoy a fantastic meal. Some days it's something new and exciting and some days it's just a repeat of a family favorite. When it's something new and it's really good, someone will say, "why don't you write about that?" The answer is really so very simple.  I didn't document a single moment in preparing the meal, nor did I take a picture of anything before the plates were completely swiped clean! So there, you have the reason why I haven't been posting. Like the Rod Stewart song says, "Every picture tells a story don't it"? I may not be able to clearly express myself through my words all the time but if I have a picture....well, sometimes it's all I need!

Tonight was perfect. I found myself alone in the house, getting ready to make dinner for myself. (Yes, I do cook for myself. I enjoy good food. It's more fun to dine with others but hey, if I'm going to eat alone its got to be good!)

I spent a huge amount of time on the computer today researching some places to stay in Cabo and started yearning for those tastes that come from across the border. There was a dish that I shared with my daughter Zoe on a trip a few years back, a delicious seafood soup, and decided to play with those flavors. Lucky for me, I always have an extra bag of shrimp and calamari in the freezer. My camera was ready to go and I was all set up.


I started by chopping an onion, 5 cloves of garlic, and 2 bunches of green onions (we also call them scallions) and on medium heat cooked them until they began to sweat. At this time I added one jalapeño pepper which I had finely diced.
My friend Bobby is so good to me. He sent me this fabulous seasoning from Mexico and I added 2 tablespoons of the seasoning to the garlic and onions and then added just enough tequila to make the mixture move a little.
I let the tequila cook off a little, and if you would like you may also add some wine at this time. Give the wine enough time for the alcohol to burn off before adding the squid or shrimp. I added about 2 pounds of squid, which were cleaned and the tubes were cut into rings. Italian plum tomatoes were then hand crushed, about 2 pounds, and mixed in. Protect yourself! It's a messy job hand squishing tomatoes. Without an apron my shirt gets zapped with tomato juice!
Next add the 2 pounds of shrimp, I like to use the size 12-16 to a pound , they are nice and plump and can be cut into a bite size and still have a clean fresh taste. I clean the shrimp, devein them and remove the tails. They are big enough to cut into 3 pieces each.
Add a handful of fresh chopped cilantro, fresh sage, and season with salt and pepper to taste. and Cook for another 5 minutes - 10 minutes. You do not want to over cook the shrimp or the calamari.
Ladle the soup into a nice big bowl,  give it a squeeze of some fresh lime juice,  garnish with a few slices of avocado and chopped cilantro, serve with a Tostadas, and enjoy!
Buon appetito
xoxoxo
Lorraine ❤




Friday, June 22, 2012

Pickled Eggplant

I can remember the first time I tasted pickled eggplant at my mother in laws house in New Jersey. My father in law brought home a bushel of white eggplant from a farm in Southern New Jersey. He did that all the time, if he saw something while he was out and it looked good, he came home with a case or a bushel of it! As I think of this I am realizing where my husband gets this from!
 My mother in law was a little exasperated by the amount of eggplant in front of her, after all she wasn't feeding an army, it was just the two of them, but she knew exactly what to do with all of them! Of coarse there was a tray or two of parmigiano made but the rest were pickled and went into jars.  If you were lucky you were gifted with one of the jars filled with this simple refreshing and delicious mixture!
The eggplant I used for this is sometimes called a Sicilian Eggplant.  They are usually round and have a white skin.
If you can't find a white eggplant use the purple ones.

This recipe is very simple, and very easy to make.


For one jar you will need

1 large white eggplant, peeled and cut into 1/2 inch pieces
1 1/2  cups white vinegar
1 1/2 cups water
4 - 5 cloves peeled garlic, cut into pieces
1 bay leaf
1 tablespoon salt
olive oil
oregano to taste
red pepper flakes
fresh chopped parsley
* may add capers if you like them

In a pot large enough to cook the eggplant, bring the vinegar, water, garlic and red pepper flakes to a boil. Add the eggplant, bay leaf and the salt.  Cook the eggplant until it gets soft, this takes about 5 minutes. Drain the eggplant mixture.
In a bowl mix the cooked eggplant with the fresh chopped parsley, a pinch or dried oregano, a pinch of red pepper flakes and more salt to taste.

Put your epplant into a jar and top it with olive oil, cover and let it sit for a few days to let all the tastes marry.
This never lasts in my house. As soon as it chills it's gone!


Buon Appetito
xoxo
Lorraine


Thursday, May 17, 2012

Wok Wednesdays!

While surfing around the other day I found a blog that I would like to share with you all.  Matt from GreenEatsBlog was encouraging other bloggers to participate in Wok Wednesdays.  If you would like to participate, please go to Wok Wednesdays blog and sign up!

On selected Wednesdays  a recipe will be featured out of Grace Young's cookebook, Stir-Frying to the Sky's Edge.

Yesterday was our first Wok Wednesday, with a very simple Stir- Fried Garlic Spinach! This was very fast and yummy. It took me longer to clean the spinach than it took to cook it.

I purchased 3 bundles of fresh spinach thinking that would probably give me the 16 cups of spinach that the recipe was calling for.  I've forgotten what a pain in the a$$ it is to clean fresh spinach. I've gotten very used to the triple washed, cleaned and trimmed spinach that you can purchase these days! haha!


I cut off the bottom of each bundle of spinach.
I filled the sink with the spinach and then ran cold water over the spinach and let the spinach sit. I removed the spinach from the water, cleaned out the sink, there was plenty of sand and dirt on the bottom and repeated the cleaning process. I think I did this 3 times to make sure there was no dirt left anywhere! There is nothing worse than chewing on sand! So when you think it's clean, clean it again!

The Woking part was easy! I heated the oil and waited until it was hot enough, added the garlic and worked quickly so the garlic didn't burn. The spinach was added and tossed and then sprinkled with a little salt and tossed again.
Out of the wok, and into a serving plate, right to the table.
Enjoyed by all!
I'm looking forward to woking again. We'll be making a chicken dish. Check back soon!
Buon Appetito
祝您好胃口
xoxoxo
Lorraine

Monday, April 16, 2012

Spaghetti and Chopped Clams

As much as I always love to use fresh products whenever available some days that can be a challenge depending on the kind of day I am having. There are days where I run out of hours. I had meant to go shopping and just never got to it,  and then there are those days that I had planned to eat out and for some reason it just didn't  happen.
For the reasons mentioned that's why you can always find a can of chopped clams in my pantry.  In a pinch, I can serve up a dish of linguini or spaghetti with clam sauce in under 30 minutes. Rachel Ray would be so proud of me! LOL!


This can is a time saver and will make a quick, easy and delicious dish of pasta.
I drain the can and reserve about 2 cups of the clam juice. Then I rinse the chopped clams.
Chop 4 - 6 cloves of garlic and add them to your pan with 2 Tablespoons of Extra Virgin Olive Oil. Add two anchovies to the garlic and cook on low heat. I know some of you are turning your noses up at the addition of anchovies. Please try it. They will add such a nice flavor to the dish. You will not taste the anchovie. It just kicks up the flavors a notch.
You don't want the garlic to burn or get any color. This will make the garlic bitter. Cook until the anchovies fall apart and the garlic is tender.
Add the can of chopped clams.
Season the clams with salt, black pepper and a pinch of red pepper flakes.
Cook the clams in the garlic for about 5 minutes. This doesn't take long!
Add chopped flat leaf parsley ( I chopped a handful and added it) and at this time added a little bit of the clam juice.

It's that simple.
Cook your pasta in salted water. The water has to taste like the sea!
There was a box of spaghetti in the pantry. I cooked it as per instructed on the box less one minute.
Remove the pasta from the cooking liquid.
Remember to reserve one cup of the pasta cooking water.
Add the cooked pasta to the clams and toss making sure all the pasta gets hit with the clam sauce. If you need more liquid add some of the reserved pasta water.
Divide the pasta into individual serving dishes and top with a little fresh parsley.
If you like, you  could also add some grated cheese. I don't do that, but hey if you like it, who am I to tell you that you shouldn't. You won't find the cheese on my table, but you will find extra red pepper flakes!

This is a delicious dish. The only way it could be better would be to have been able to cook with live fresh clams in their shell!
Next time!
Buon Appetito
xoxoxo
Lorraine


Tuesday, August 9, 2011

Tomatillo's

Have you ever been in the market and passed by the Tomatillo's and said to yourself "What are these?" "What do I do with these?" I have on many occasions, and finally one day I broke down and filled a bag with them, brought them home and looked at them for a few days, and still didn't know what to do with them. Now that I've figured it out, we can't get enough of this easy, simple salsa verde.

I love it when you can keep it simple and something only takes a very little prep. You are going to love this. It is fabulous as a dip with tortilla chips or as a sauce on your meats or poultry.
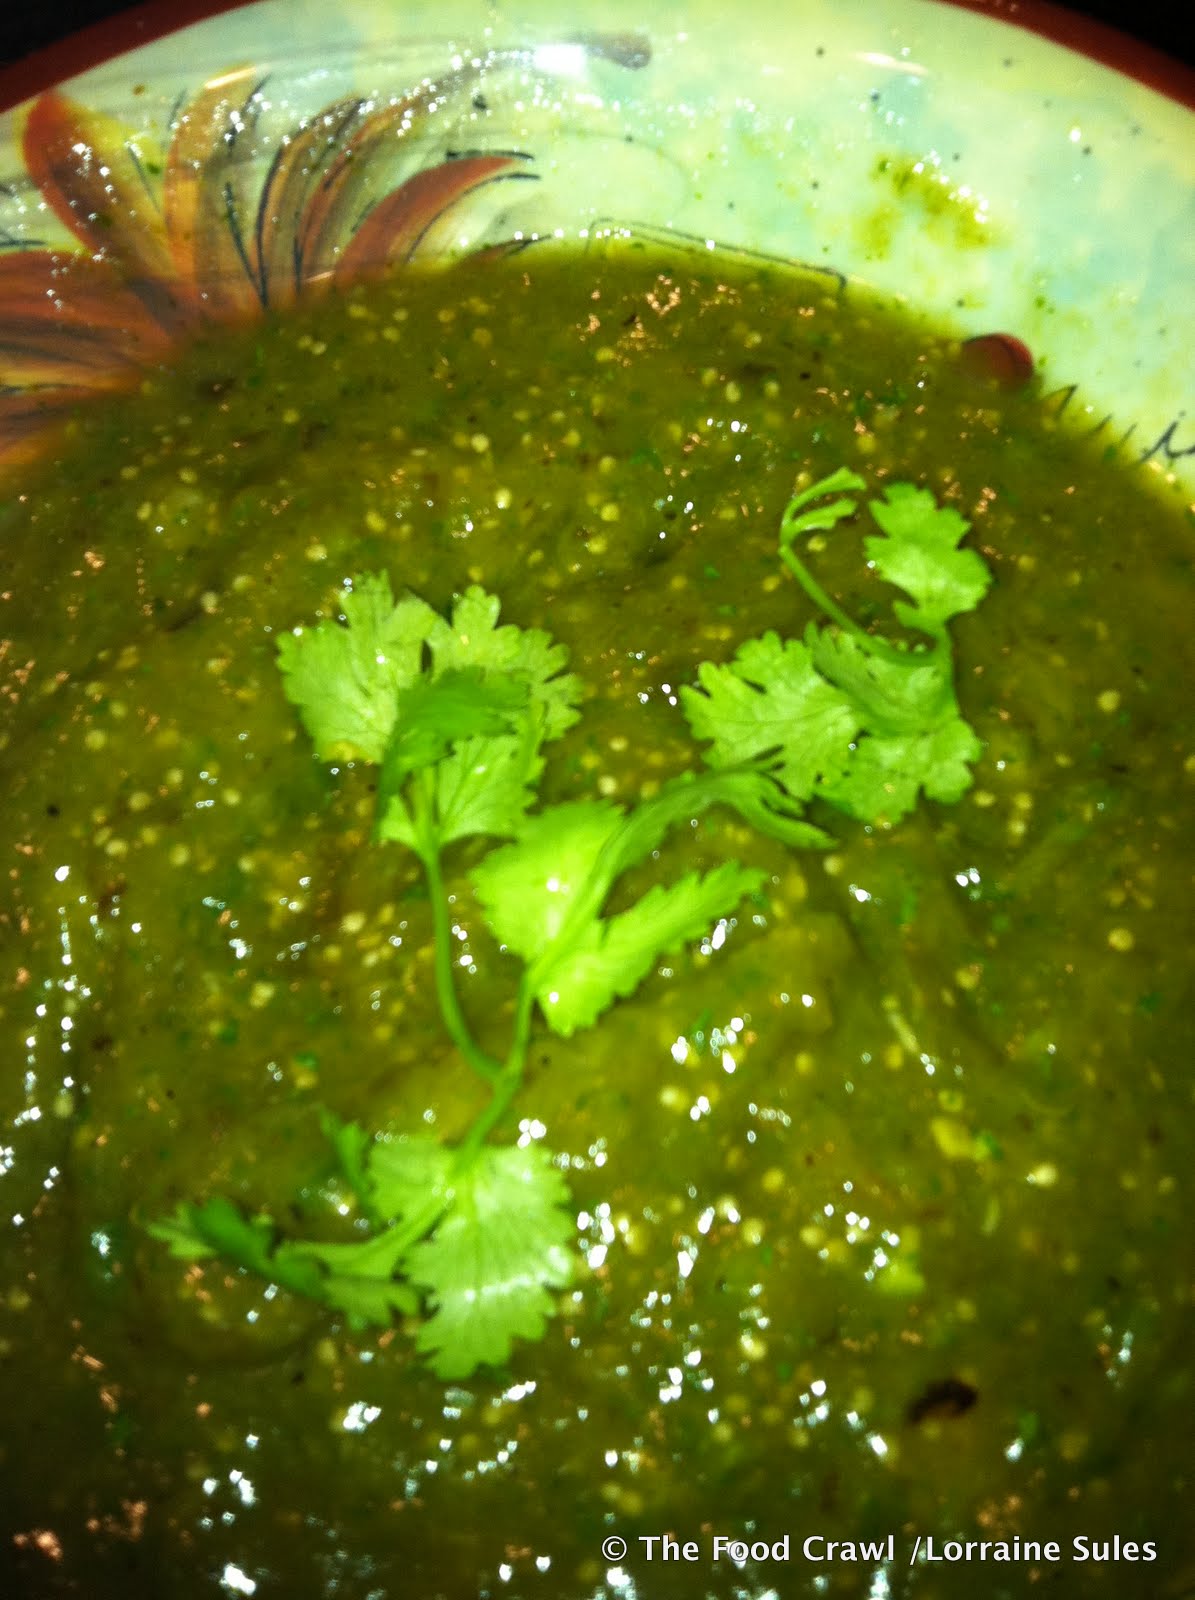
Take the tomatillo out of the husk and wash them. Cut them in half and arrange them on a cookie sheet that has been lined with aluminum foil.
Bake them in a preheated 450 degree oven until the skin on the tomatillo blisters and gets charred.  Check them after 10 - 15 minutes. Once they have a nice color take them out of the oven and put the tomatillo's into a blender or a food processor.
Add 1/2 a white onion, 2 cloves of garlic, 1 Jalapeno pepper, cut in half and seeded, and a handful of fresh cilantro. (I just love fresh cilantro from the garden!) Let the blender pulse everything together.


Remove from the blender.  Season with some salt and the juice from one fresh lime. Taste it! It's sweet and tart and a little bit spicy. If you're not into the heat, start with 1/2 a Jalapeno pepper instead of a whole one. This salsa adds such a dynamic taste to any kind of BBQ'd or roasted meats, and is simply delicious on it's own with some chips.

Enjoy!
Buon Appetito!
xoxoxo
Lorraine


Sunday, August 7, 2011

Sunday Meatballs

Is it Sunday Gravy or Sunday Sauce? I've seen many posts on which one to call it. All I have to say, is that I don't care what you call it as long as you make it well!
This week I went shopping at Restaurant Depot. For those of you who have had the opportunity to shop in one of these warehouse you will know that the quantities that you must purchase are enormous! Think Costco, Sam's, B.J's amounts and triple the quantity! They had some chop meat that looked really good, so I bought the package. The package was 10 pounds! I made some hamburger patties, made stuffing for the zucchini flowers and had enough left over to make meatballs for dinner tonight.
When ever I make my meat balls I always start with fresh chopped onion, garlic, parsley, seasoned breadcrumbs, eggs, and grated cheese. I usually only use Parmigiano in my meatballs, but today used a combination of cheeses that were in the refrigerator, Parmigiano and Pecorino. Again, I thank my friends from Rome, Giorgio and Marina who brought me fabulous cheese from Italy!
Some days I like the meatballs to be more rustic and will chop the onions and garlic by hand. Today I wanted a smoother meatball so I tossed everything into the food processor and pulsed it a few times to get the onions and garlic almost like a puree.
I was also in the mood for big meatballs, so I made them really large. 
Line the baking sheet with some parchment paper and bake the meatballs in a  450 degree preheated oven for about 15 minutes. Turn them around and baked them another 15 - 20 minutes. 
These were extremely cheesy.  And they were nice and soft! Into the tomato sauce they go!


I used 4 quart jars of the tomatoes that I jarred last season. I've got to use up what's left in my pantry. It's almost time to make the sauce again!
Start the sauce with a little bit of olive oil in the bottom of the pot. Add to the oil a  small chopped onion and a few cloves of garlic, chopped. Saute the onion and garlic just until they start to sweat, and become clear. Add the tomatoes and stir.  I added some hot sausage, which I had browned on each side, to the pot,  and a few pieces of country pork ribs. To season the tomatoes I also added fresh chopped parsley, salt and pepper and a pinch of red pepper flakes. Cover the pot and let everything simmer for a few hours. I know it's done when the pork flakes off the bone!

Tonight, this is being served with Spaghetti! There's nothing like a great dish of spaghetti and meatballs on a Sunday afternoon.  Hopefully they'll stop stealing meatballs out of the pot so there will be enough left for dinner!

Meat Balls Recipe

chop meat (I like chuck for this, has lots of flavor)
eggs (I use 2 - 3 eggs per pound of meat)
1 large onion, chopped
3 - 4 cloves garlic, chopped
1/2 cup fresh chopped parsley
salt and pepper to taste
1 cup grated cheese
1 handful of breadcrumbs- just enough to bind the mixture

Mix all the ingredients together until well incorporated. Form the meatballs and either bake them in the oven  @ 450 degrees for 15 - 20 minutes on each side or pan fry them to brown them on all sides.

Add the meatballs to your favorite tomato sauce, simmer until cooked through and serve with your favorite pasta! Enjoy!

Buon Appetito
xoxoxo
Lorraine

Thursday, August 4, 2011

Stuffed Zucchini Flowers

Hello Friends! It certainly has been awhile since I've shared some of my family secrets! I'm strictly speaking of cooking secrets, and sharing some coveted family recipes!
I've had a very relaxed and enjoyable summer. We spent two weeks out in Montauk, New York on the beach. Every day was a glorious day. Wish I could have spent another week out there.  hint, hint!!
I am so relaxed.


Today's Food Crawl is all about Stuffed Zucchini Flowers!
Now it's time to get back to sharing some of the food that gets made and created in my kitchen.
Today I'm going to tell you all about my mothers Stuffed Zucchini Flowers! It was my mothers Birthday August 2nd. Thinking of her always makes me think of the special dishes that she used to make. Stuffed Zucchini Flowers were among the amazing.  My husband would eat them out of her refrigerator before she had fried them!
 I actually made my audition tape for MasterChef - Season 2 preparing these. I was trying to upload the video but apparently it is too long to post on here. My son, John, the Pepperdine Movie Production Graduate promised to break it down for me so I can share it with you.  When he does I'll just post it. You can see how nervous I was while making the tape. My next audition tape will be very different! lol

My friend Jersey Paulie  has been asking me for this recipe. This one is for you Paul! Recipe will follow, keep reading!

In my garden I always plant more zucchini plants than I need just for the flowers. Today I was able to pick 11 flowers. There will be more tomorrow! 11 stuffed flowers is such a tease! I'll bet you can't only eat one! lol
You can do so many different things with them. They are delicious in a batter, made into a pancake, they are delicious stuffed with cheeses,  or stuffed with a crabmeat mixture is always yummy. My mother loved sausage and chopmeat! Our recipe is for a blossom stuffed with meat.

The earlier you get into you garden in the mornings the better. You will find these gorgeous blossoms fully opened, just waiting to be picked. The flowers that should be picked for stuffing are the flowers that are attached to long stems.
If you don't have these available in your garden ask a local farmer to sell you some of his Zucchini Flowers. Most farmers will sell them to you.  If you are really desperate go to a specialty italian store. They will  charge you an arm and a leg for each flower, so try your local farmers market before making an investment!
With a few simple ingredients you will impress your family and friends. Promise!
I'm starting with some chop meat, sweet Italian Sausage, fresh parsley, onion, garlic, parmigiano cheese (thank you Giorgio and Marina, who brought me cheese from Rome!), eggs, salt and pepper and seasoned bread crumbs. Rough cut the onion and smash the garlic and add them to a frying pan with a little bit of olive oil. Add the chop meat and the sausage meat, removed from the casing into the frying pan. Season with salt and pepper. Cook until the meat is cooked through and the garlic is tender.

While the meat is cooking you will want to clean the flowers. I have found ants crawling around in them. You can just delicately wipe the inside of the flower to remove the ants. You can also run the flower under some water .

Once I clean them I place them on a paper towel upside down. This helps the blossom stay open a little to make it easier to stuff them.

They are so delicate and they will rip and tare so be gentle!
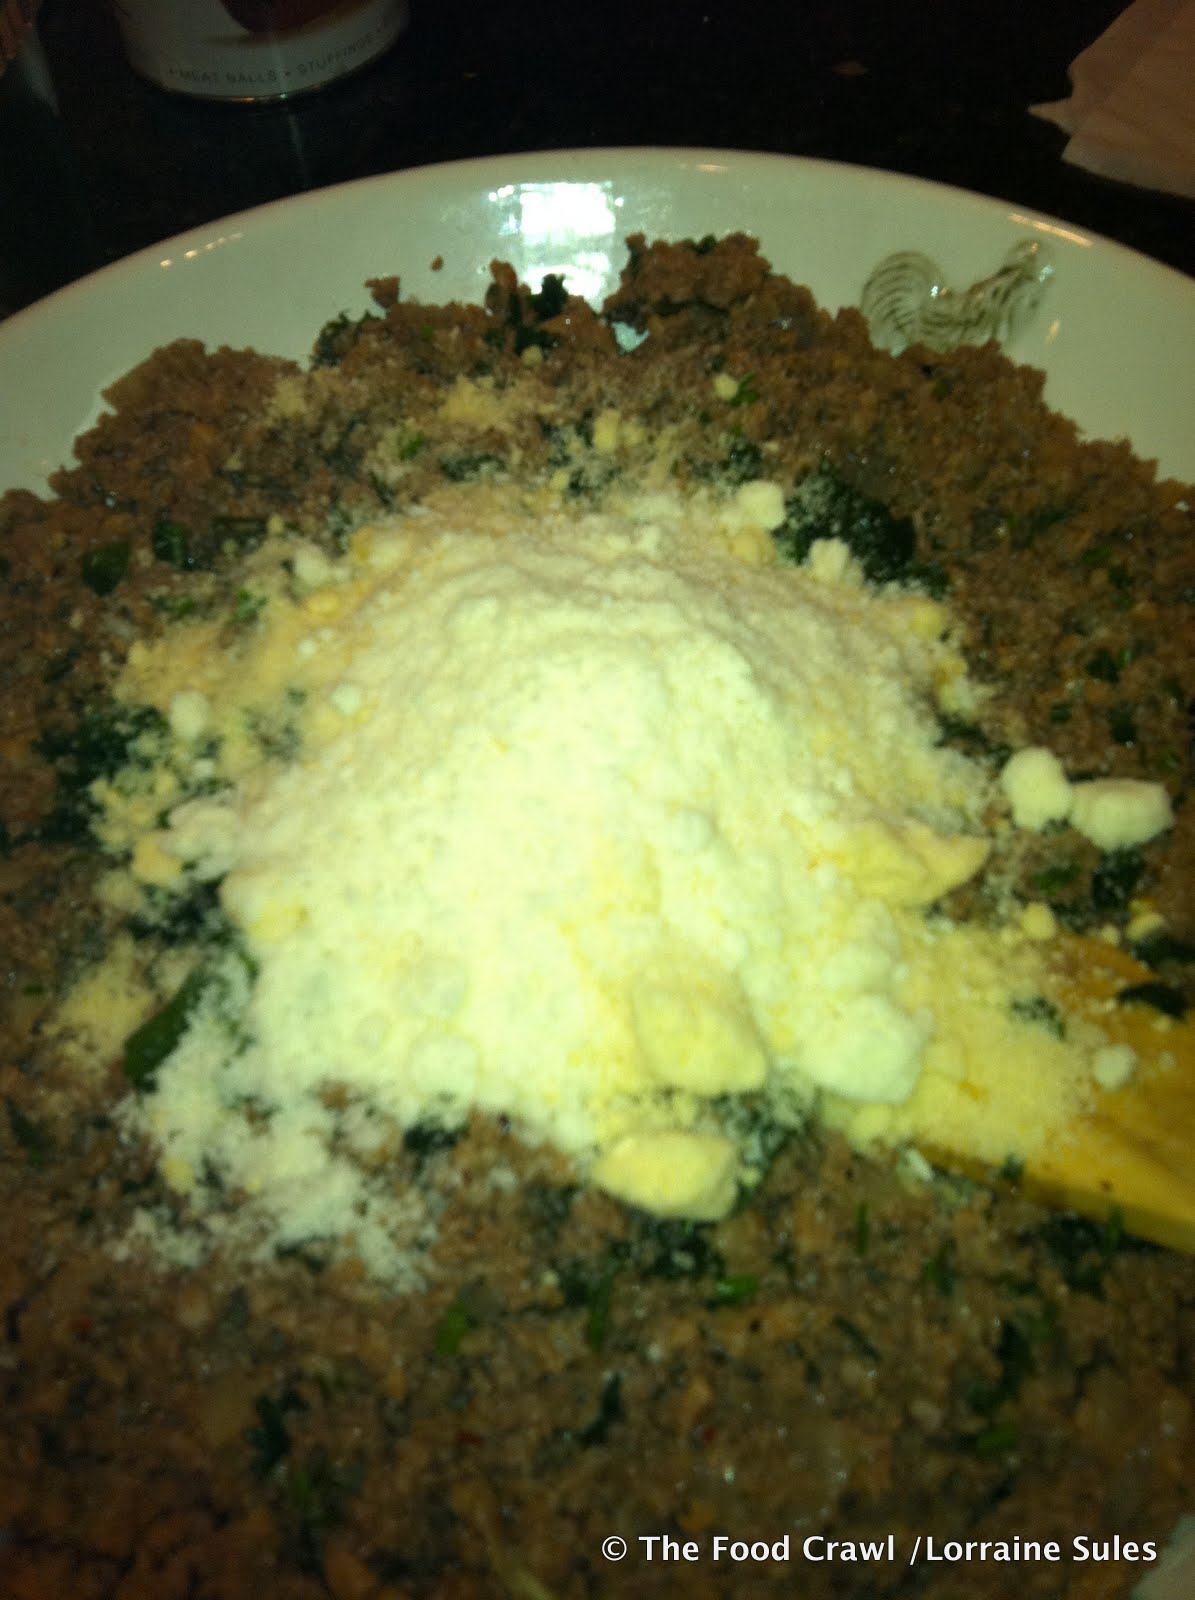
With a slotted spoon remove the meat into a food processor and pulse it a few times until the meats are well incorporated with the onion and garlic. Remove the mixture from the food processor . In a large bowl add fresh chopped parsley, and grated cheese. Mix well. Taste as you go along. You may want to add more salt or pepper or perhaps even more cheese.
Time to stuff the flowers! I use a baby spoon or a demitasse spoon. If I had a pastry bag I imagine you could use that as well. It probably would make my life so much easier! lol
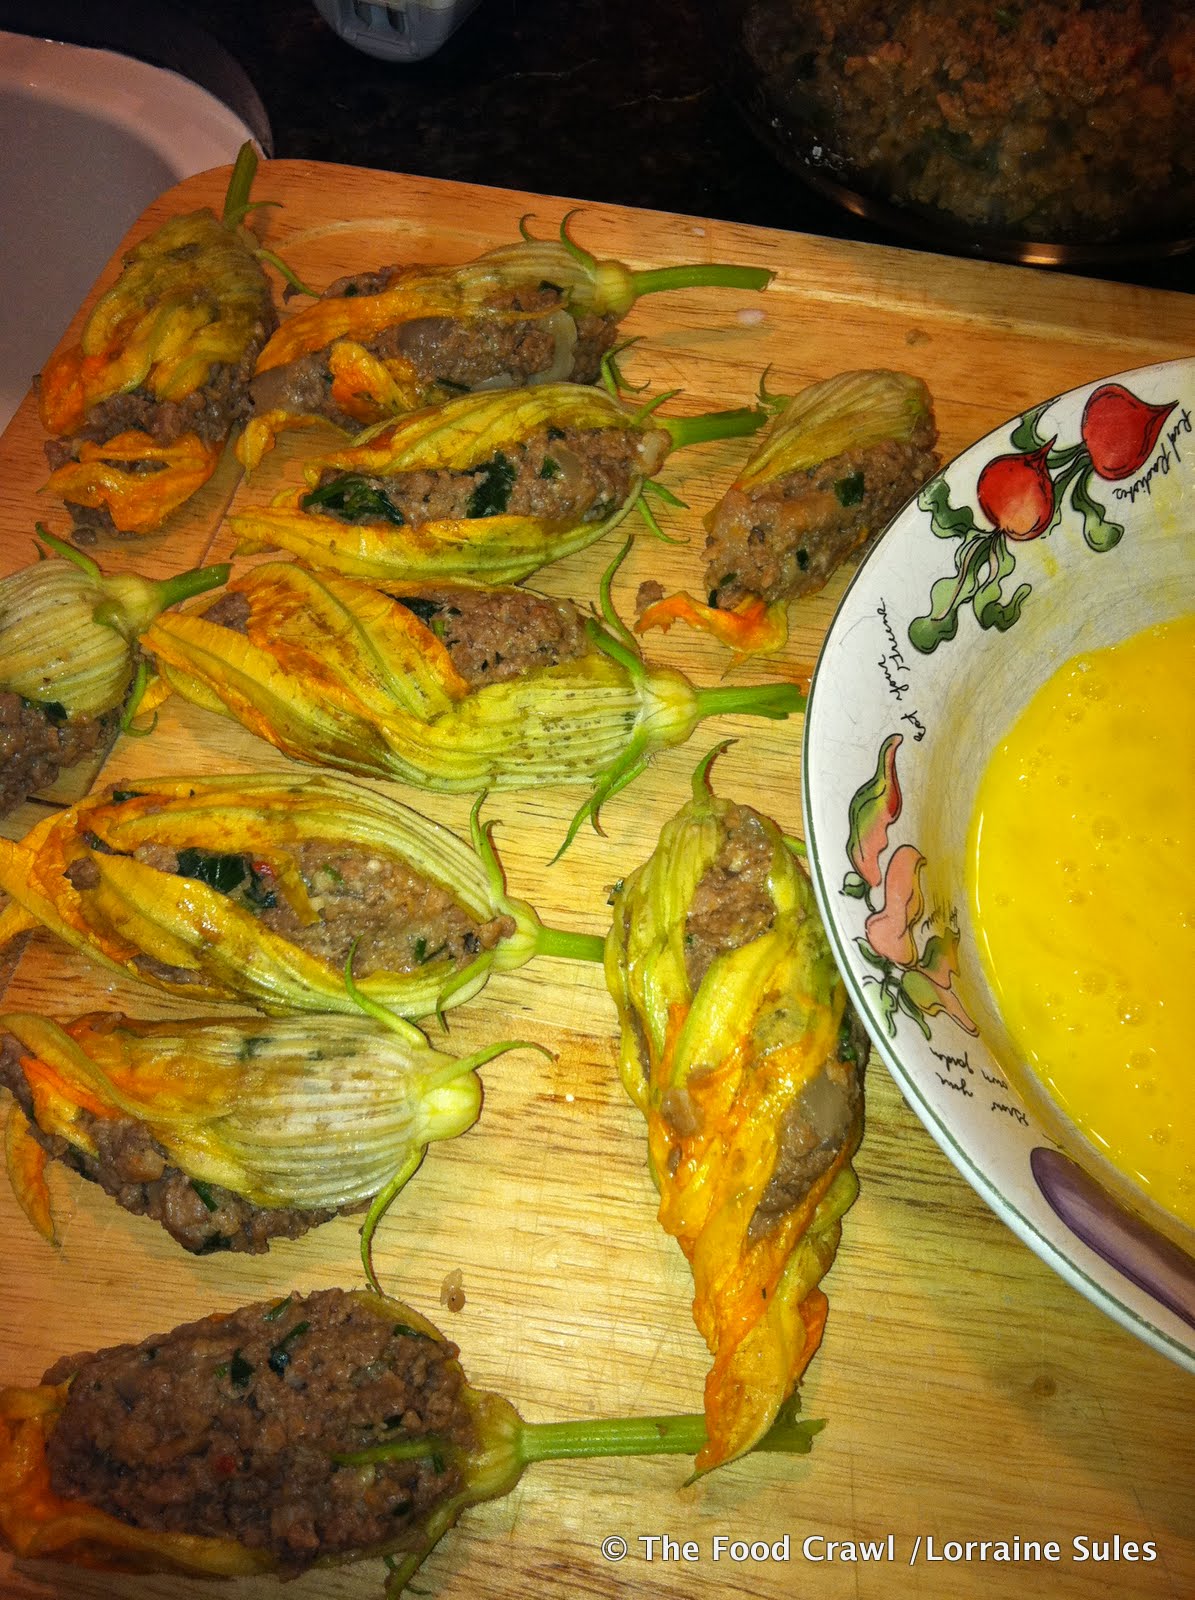
 I hold the flower between my thumb and cup it with the rest of my fingers, trying to keep the flower open. With the spoon I add the meat mixture and push down until the flower is completely full. I squeeze it gently so the mixture gets encased by the flower.

Repeat until you are done stuffing all the flowers.
Beat an egg and roll the stuffed flower into the egg and then gently roll the egg washed zucchini flower into bread crumbs.
 Repeat until all the flowers are breaded.

Pan fry the stuffed flowers in a little bit of oil until they are lightly browned on all sides. You can also flash fry these.


Recipe
Zucchini Flowers
1 large onion chopped
4 - 5 cloves garlic, peeled and chopped
1 pound chop meat
1 pound sausage
1/2 cup chopped fresh parsley
1/2 cup grated Parmigiano cheese
salt and pepper to taste
1/2 cup seasoned bread crumbs
1 - 2 eggs, beaten

You can cut down on amounts in the recipe. This will make quite a bit of mixture. The leftovers can be used in stuffing so many other things, and it never goes to waste in my house! Check in later this week for more ideas on what you can stuff!

Thanks for visiting today! I've missed you!
Buon Appetito!
Lorrraine
xoxoxo

Friday, June 17, 2011

Stuffed Portabella's

Food Crawl with Portabella's!
I made these the other night for our guests. My family and friends went gaga over them.  It's not like I've never made stuffed mushrooms before! My secret ingredient in these must have been the prosciutto!
To make these you'll need
8 large portabella  mushroom caps
8 links of Italian Sausage
1 large onion, chopped
2 - 3 cloves garlic, smashed and chopped
fresh chopped parsley
handful of breadcrumbs
handful of parmigiano cheese
salt and pepper to taste
mozzarella  cheese
prosciutto

Take the sausage meat out of the casing and in a large frying pan, cook the sausage with the onion and the garlic. I added a pinch of rosemary to the cooking sausage. Just a pinch! ;)

After it is cooked through, put it all in the food processor and pulse it a few times. Put your meat mixture into a bowl and add a handful of seasoned bread crumbs.
Just a handful, not too much. If you'd like, add a handful of parmesean cheese at this time.
I sliced up some prosciutto and some mozzarella cheese and added it to the mixture.  Line a baking sheet with parchment paper, and then lightly stuff the mushroom caps.
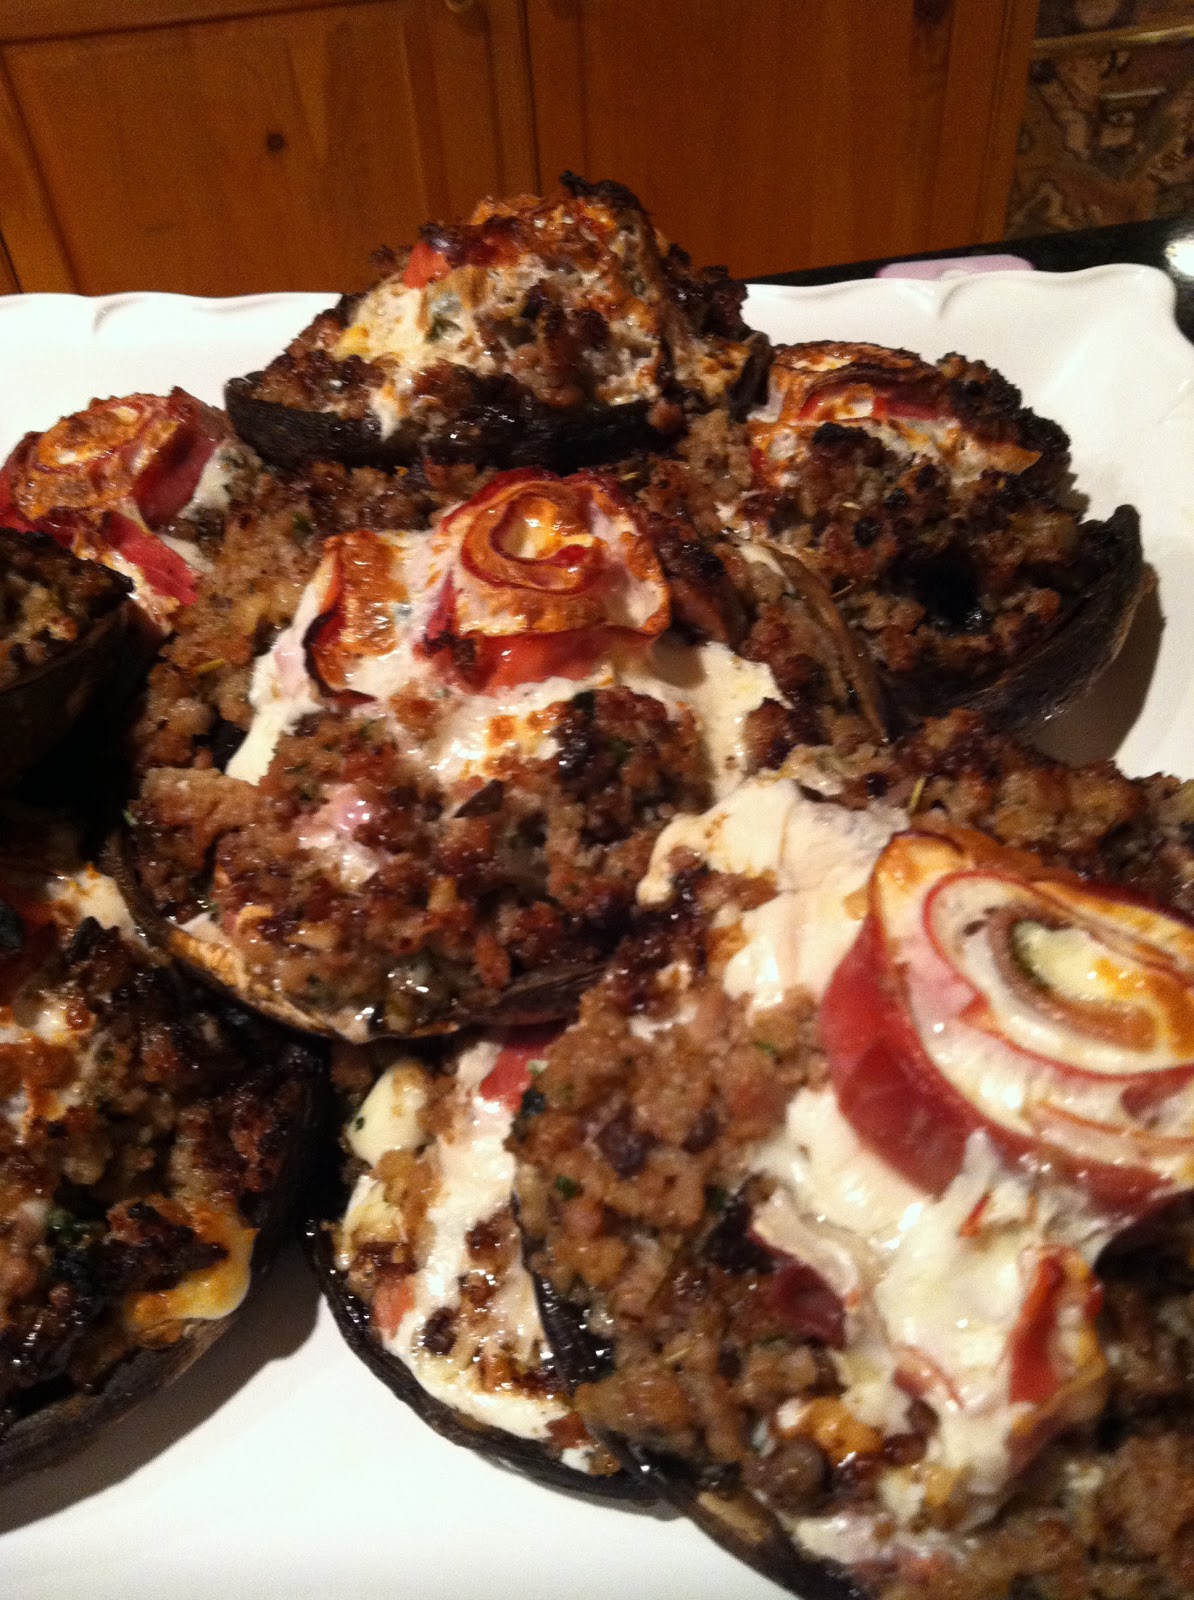
Just before putting the mushroom caps into the oven I topped them with a slice or two of rolled mozzarella cheese and prosciutto. Drizzle with olive oil and bake in a preheated 375 degree oven for 15 - 20 minutes. You want the mushroom to wilt a little and the cheese to melt.
When you take them out of the oven they should look something like this!
I served these with a grilled Romaine Caesar Salad!

Stephen getting ready to fire it up!


If you've never grilled Romaine, you should try it. Delicious!

Enjoy!
Buon Appetitto
xoxoxo
Lorraine